

Perhaps nothing is more personal and individual to engineers than our particular strategies for solving problems. In decades of managing scores of engineers on dozens of projects, I’ve carefully watched literally hundreds of engineers at work. Each one has a characteristic style, a way of thinking that becomes visible, a process for harvesting and then narrowing possibilities that is both analytical and intuitive at the same time.
Problem solving is perhaps the only engineering skill that is not transient. During our careers, we’ll dive into dozens of technologies that will later become obsolete, and we’ll invest countless hours crafting elaborate designs that quickly fall by the wayside in the wake of ongoing progress. But our analysis and debugging skills transcend the whims of Moore’s Law, integration, and aggregation. And, regardless of the type of system we are designing or fixing, our individual style is both personal and consistent.
In engineering school, little time is spent on problem solving itself. Sure, there are some courses that attempt to instill some rudimentary pedagogical methods, but, in the professional world, I have never seen an actual engineer who follows the academic flowchart. Most of our engineering education is, ironically, of a transient nature, focused on the hot technologies of the day, with little regard to the fact that those technologies will be long forgotten for the majority of our professional careers. Little dedicated time is spent on the isolated aspect of problem solving itself – yet that is probably the engineer’s most valuable and enduring skill.
We tend to evolve and develop our actual individual problem-solving strategies through project experience, and that experience accumulates across projects and disciplines. On systems with which we have intimate familiarity, we can often perform what seems like magic. We recognize a particular set of symptoms and intuitively know what’s causing the issue, even though the source of the bug may be numerous layers of cause and effect removed from the manifestation. We’ve all seen the old-school mechanic walk up to the idling car and say “water pump’s about to go,” even though the car appears to the layman to be working perfectly. Decades of experience listening to the sounds of broken machines have instilled an uncanny ability to divine problems simply by the song the system is singing.
Sometimes, though, our magic deserts us.
Recently, I had an opportunity to exercise my own hard-earned problem solving skills. We were on an extended trip on our boat, and the macerator pump unexpectedly stopped macerating. Without getting into too many gory details about the purpose of macerator pumps, let’s just say that living conditions on the boat could deteriorate rapidly with this component not functioning. The pump itself is comprised of a brushed 12V DC motor driving a self-priming diaphragm pump with a series of “duck valve” one-way check valves to keep the fluids flowing in the right direction.
It’s a very simple system.
In our case, the pump was running, but no fluids were flowing. Seems simple enough, right? My problem-solving style always involves beginning with a clear understanding of all the symptoms. Obviously the pump isn’t doing its self-priming thing. Since we were underway at sea, I decided that the first course of action should be to simply let the pump “run for awhile.” (Did I mention we were underway? Well, yes, for various reasons unrelated to this discussion, this particular system is operated only while underway at sea.) This type of pump is completely safe to ‘run dry’ as it won’t overheat or do any damage if it isn’t primed while running. And, another part of my problem-solving style is to not jump too quickly into the abyss. Sometimes, things just heal themselves, right? Right?
After about fifteen minutes of running and watching and wishing, the system was still not doing its job. The motor was running fine, but nothing was being pumped. My best guess was that the supply line or the one-way valves were clogged or otherwise not functioning properly. That meant I was faced with the unenviable task of descending into the lazarette (an incredibly cramped mechanical space, probably 2 feet tall and 3 feet wide where the pump is located) and disconnecting the hoses and valves from the pump in order to correct the “not self-priming” problem. Climbing into the lazarette is itself akin to some advanced series of yoga moves, or that trick where the magician packs himself (or better yet a willing assistant) into a tiny box. Orienting your body in a way that allows you to work with tools, light the critical locations, and establish at least some rudimentary precautions to protect yourself from the less-than-ideal nature of the fluids being transported is challenge enough. Doing all that while the boat is underway adds a nice additional degree of difficulty.
After an hour or so spent removing, cleaning, inspecting, and replacing all of the relevant hoses and valves (and, oddly, finding nothing amiss), it was time to test the system again. I flipped the switch and… nothing. Now, the pump motor wasn’t even running. My first suspicion was that I had somehow managed to disconnect the power supply from the motor during my overhaul of the mechanical part of the system. I descended again into the depths of the lazarette and carefully checked the electrical connections. All seemed fine. I then checked the voltage at the connector and found it to be the expected 14.1V delivered by the engine alternator charging the battery system while underway. (Yep, we were still underway.)
I think you might agree that this is not good news. It seemed too big a coincidence that the motor would have failed at the exact time that I was working on the mechanical side of the system, yet it appeared to be the case. But, another part of my problem solving style is to eschew explanations involving coincidence. I wondered if there was some thermal protection on the motor that might have been triggered by the extended running time. It was wishful but reasonable thinking, and certainly worth a little denial-laden wait to see, again, if things would magically heal themselves.
Things did not magically heal themselves.
I decided that the motor and pump needed to be removed and probably disassembled. Once again I maneuvered into the crawl space in the lazarette, this time armed with a new set of tools. Again, I removed all the hoses, valves, and connectors, as well as the mounts for the pump and motor. The first thing I checked was that the pump was not seized up. It was not. The mechanism moved easily, and the diaphragm was intact and in good condition. I could find no reason that this pump had not been pumping – back when it was attached to a working motor.
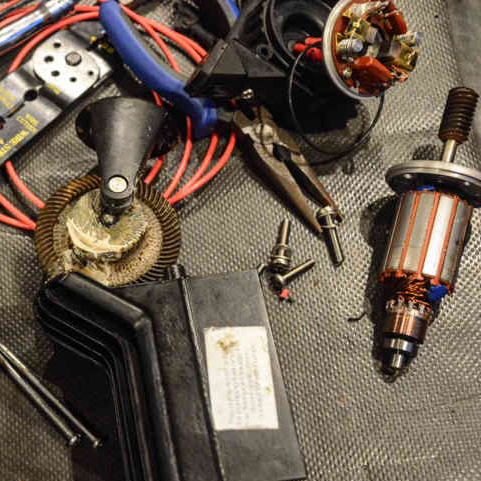
Then, with the pump completely removed from the motor, I connected the motor to the power connection. No joy. I removed and double-checked the voltage at the connector – still good. Now, as you probably have guessed, it is time to disassemble the motor itself. Luckily, I have some experience with brushed DC motors, and I felt pretty confident in my ability to at least diagnose the problem. I removed the brush assembly from the commutator. The brushes looked fine and the commutator was clean and intact. I then plugged the brush assembly into the power connection and – voila! power was present at the brushes. (Narrowing the problem is always good). That meant that there was no mystery thermal cutoff device or fuse hidden in the path to the brushes.
I then inspected the armature and commutator. Everything looked perfect and new. There were no signs of arcing and no residual smell of overheating. The mystery was intensifying. I cleaned the brushes and commutator (like a good little engineer) and carefully reassembled the motor. I then reconnected the motor to the power and… nothing. No running, no sound of any kind, no heat generated… Apparently my motor had some invisible failure. I needed a new one.
At the next port, I went in search of a new pump. Of course, there was no matching unit available, but I did find another brand – with a completely different set of plumbing and electrical connections. After spending the better part of a day browsing and accumulating plumbing fittings and adapters, I thought I had all the components I needed to conquer this beast once and for all. I returned to the boat with bags of new hardware, ready to make things right.
I decided that I should first give the new pump a quick test – before beginning all the plumbing and wiring in the deep dark cramped cave of the lazarette. I wired the appropriate connector to the new pump, plugged it into my power line, flipped the switch, and… silence.
Huh?
I disconnected the plug, measured the voltage (for about the tenth time) and sure enough, 12.6V DC. The connectors looked fine. I was a bit stumped. Could I possibly have bought a defective new pump? There were far too many coincidences stacking up. One does not win the lottery two days in a row. On a whim, I found a different circuit that used the same type of connector and plugged the new pump into that one. With low expectations I flipped the switch and – the new pump started right up!
That was completely unexpected.
Then, of course, I plugged the OLD pump into the new circuit and, yep, you guessed it, the old pump purred like a kitten. Clearly this means that the problem with the pump not running is in the boat wiring itself, and not in the pump. It does not, however, seem to explain the original mechanical issue with the pump running but not priming. Nonetheless, one problem at a time.
I then verified that, with the load of the motor connected, the voltage immediately dropped to zero. Aha! We have some high resistance (but not a completely broken connection) in the circuit! I began to follow the positive lead from the connector back through the boat’s wiring harnesses and plugs and breakers – this time with a connectivity tester, expecting to find a high-resistance point somewhere – an inline fuse that was partially blown, a switch that had oxidized contacts, or something of that nature.
After verifying good connectivity all the way back to the main house batteries, (and re-verifying for the umpteenth time that we did, still, in fact, have 12.6V DC at the end connector), I began to come to the unlikely realization that the problem might be in the ground connection. I connected the positive from the original circuit and the ground from the known good circuit and, yep, you guessed it, things worked just fine.
The ground wire goes directly from the load connector to the boat’s main electrical panel where it attaches to a giant bus bar along with every other circuit on the boat. After a few minutes searching the fifty-or-so wires attached to the bus bar, I found the one labeled “macerator pump”.
Guess what? The screw was loose.
I turned the screw about ¼ turn to tighten it and… (skipping a few obvious steps here) all was well. Not just well, but, as I suddenly noticed, better than before. The old pump was running about 4x faster than I’d ever heard it run. Apparently, this dangling ground had been barely making the connection and dropping the voltage on the pump for a long time, so it just took a slight worsening of the connection due to arcing or vibration (and there’s an ample supply of vibration on a boat) to make the motor run slowly enough that it couldn’t self prime.
Somewhere, a salty old boat mechanic is laughing quietly to himself. He probably would have listened to the sound when the pump seemed to me to be working fine and said “Hey, your macerator doesn’t sound like it’s running at the right speed – we might want to be sure that the ground connection is good.” He’d have opened the panel, spotted the loose screw, given it a quick turn, and the motor would have sped right up.
But that’s not the way it happened.